
Planning a route in PeakVisor starts with two points on the map. Click where you want to start and where you want to go, and the planner follows the trails between them. When a connection needs a detour, you can compare up to three suggested routes. Choose one, then drag a point onto a neighbouring trail if you'd prefer to go another way.
Planning a route above La Villa, choosing between three alternatives and saving it to a profile.
Start with Plan Route
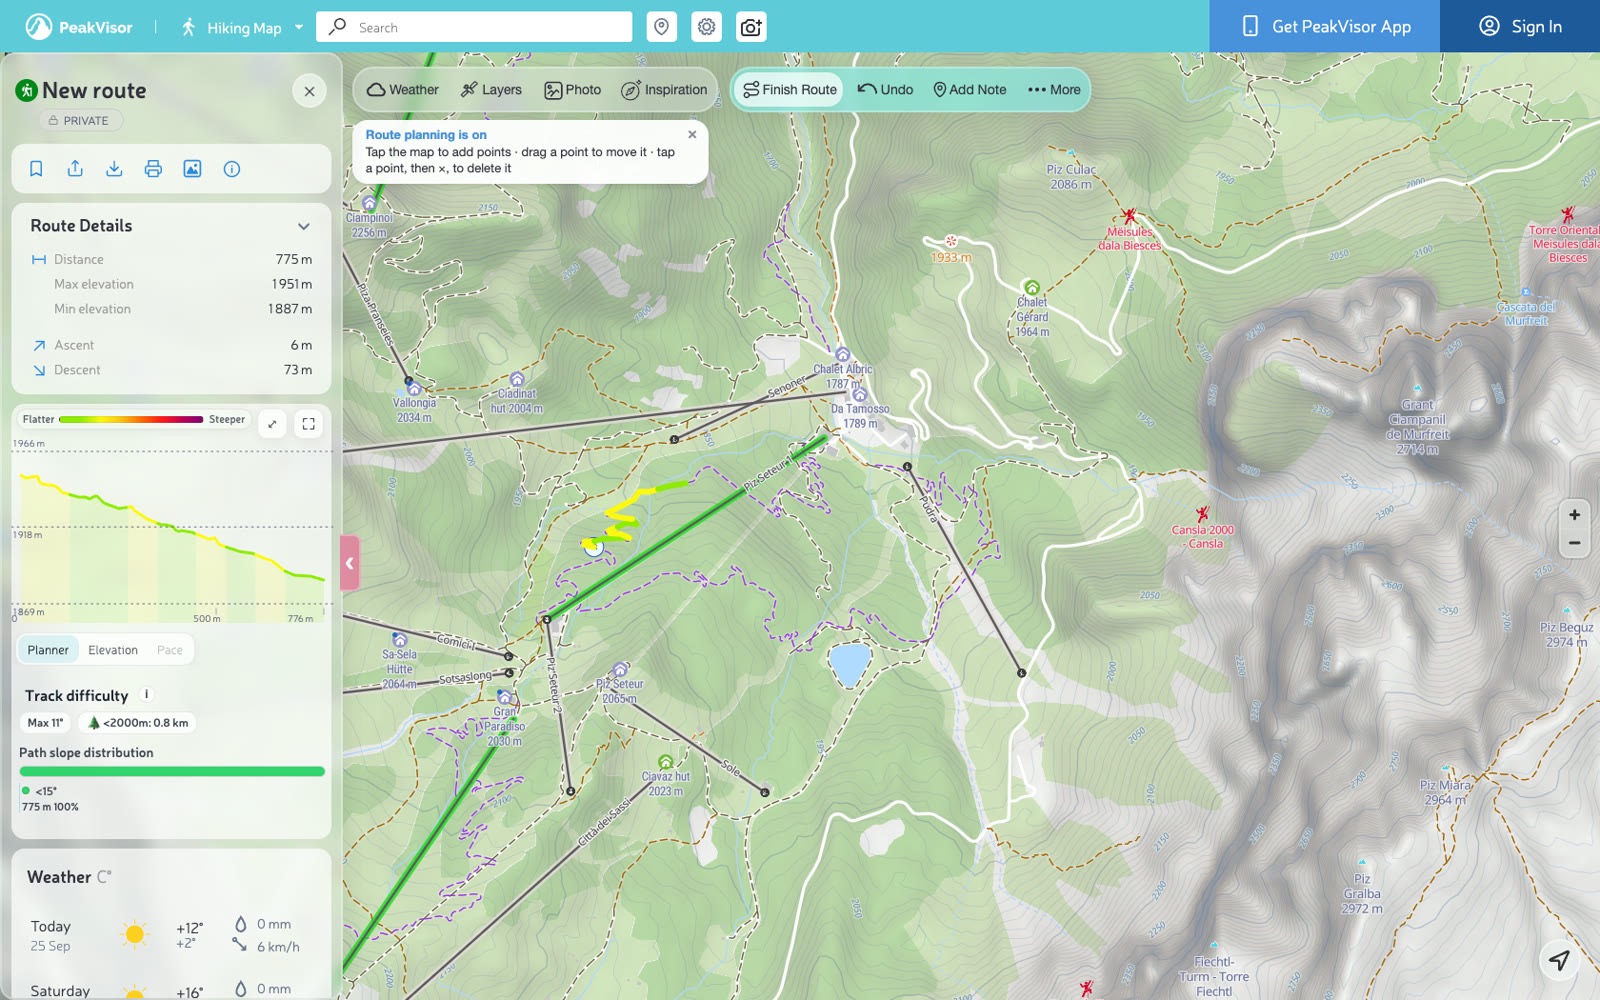
We wanted planning to be quick to pick up, with the choices you need appearing as you draw. Click Plan Route and start placing points. Trail following is already on, and hints appear along the way to help you with the next step.
Two clicks are enough to plan a section along the trails. Keep clicking to extend it towards a hut, a pass or your way back down. You can choose an alternative and adjust points right on the map, without switching editing modes.
Choose an alternative route
Two nearby trails may connect only by a longer route around a ridge or through the valley below. The planner can suggest alternatives for you to compare.
Put a point on one trail and the next on another. If the planner leaves a straight line between them, it can suggest up to three routes along nearby trails and connecting roads. These appear as preview lines on the map, with a distance for each option. Hover to compare, click one to take it. Press Escape to keep the straight line.
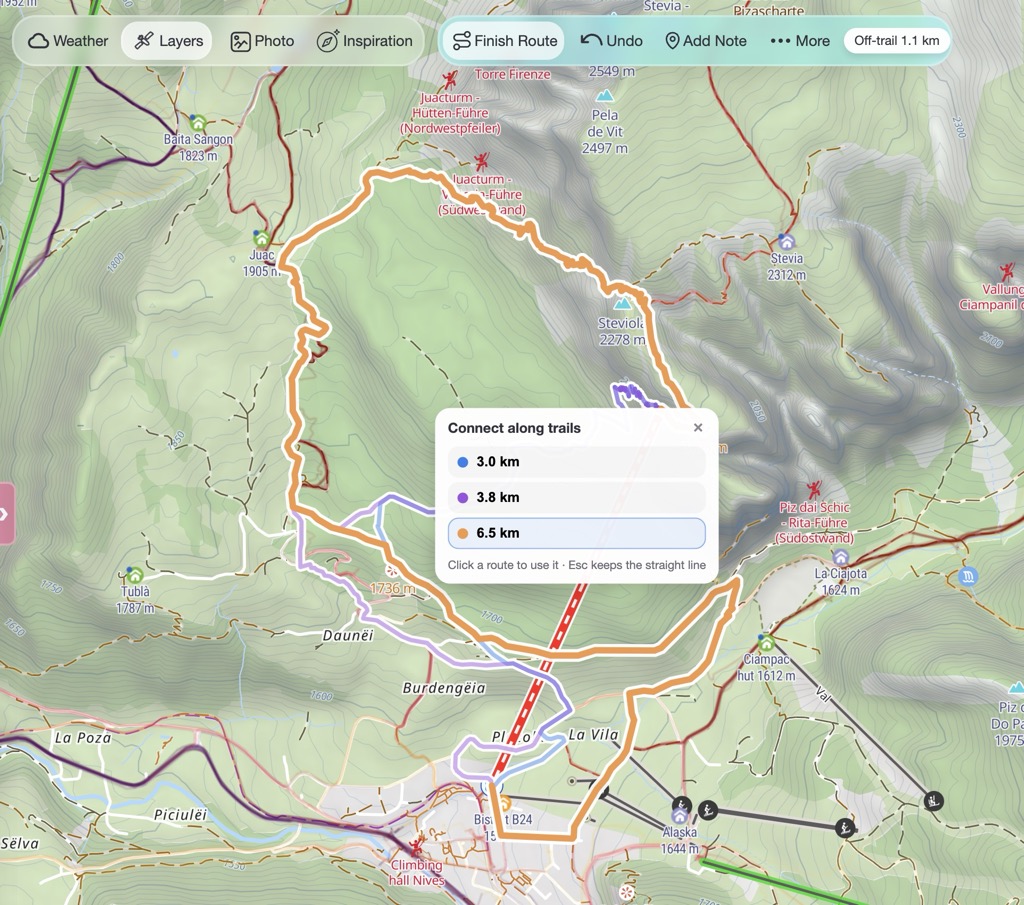
You can still edit a suggested route after selecting it. The planner adds points at the turns, which you can drag to adjust the route. A single Undo removes the whole suggestion.
To see the suggestions again, click the dashed section of your route.
Adjust your route by dragging points
Drag a point onto a neighbouring trail to change your route. You might want to take the other side of a valley or swap a steep climb for the switchbacks beside it.
The route adjusts around the point you move, while the rest stays as you drew it. If you move the point away from the trails, the connecting sections can run across open ground and are marked as off-trail.
To add a point, drag the small hollow marker between two existing points to a new position. To remove one, select it and press ×.
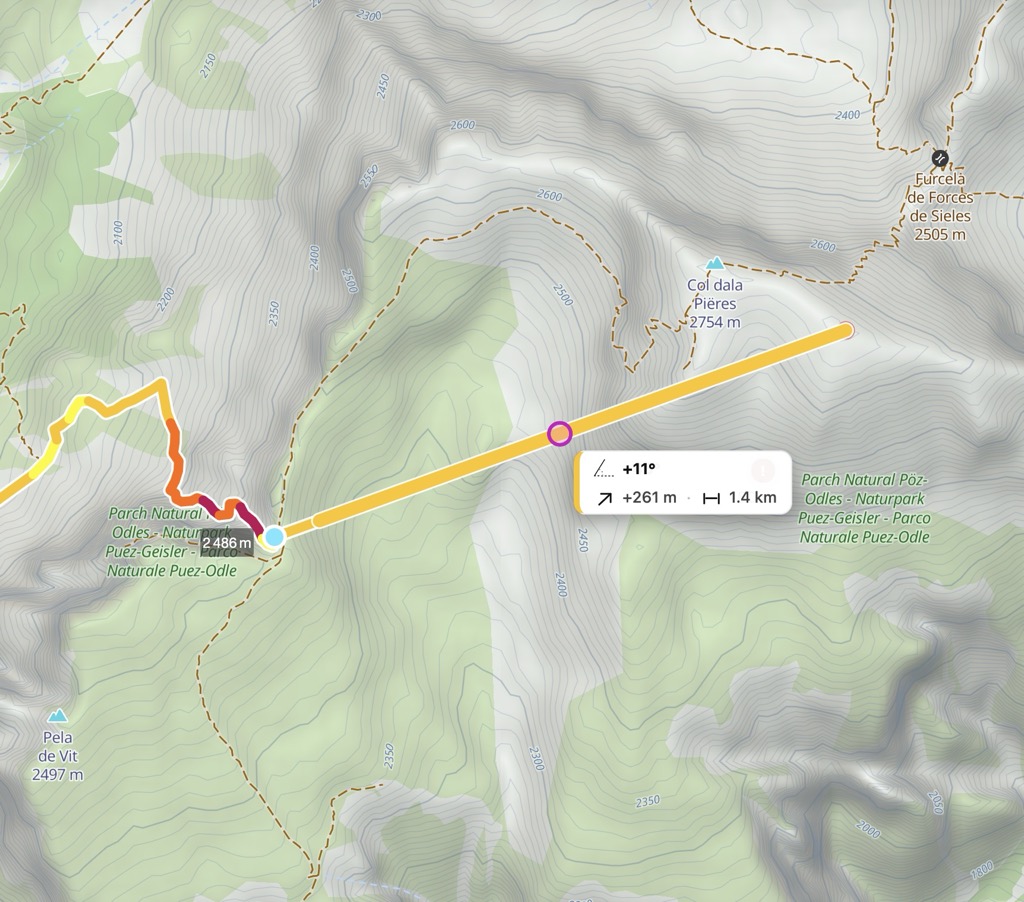
Hover over a section to see its steepness, elevation change and distance. You can use these figures to compare a direct climb with a longer, gentler route.
Off-trail sections are marked
Sections that don't follow the mapped trails are marked with a white dashed line over your route. The toolbar shows the off-trail distance, so you can spot these sections while planning.
The marking reflects the available trail data. It doesn't tell you whether a path exists on the ground or how difficult the terrain will be.
Turn off snapping for off-trail routes
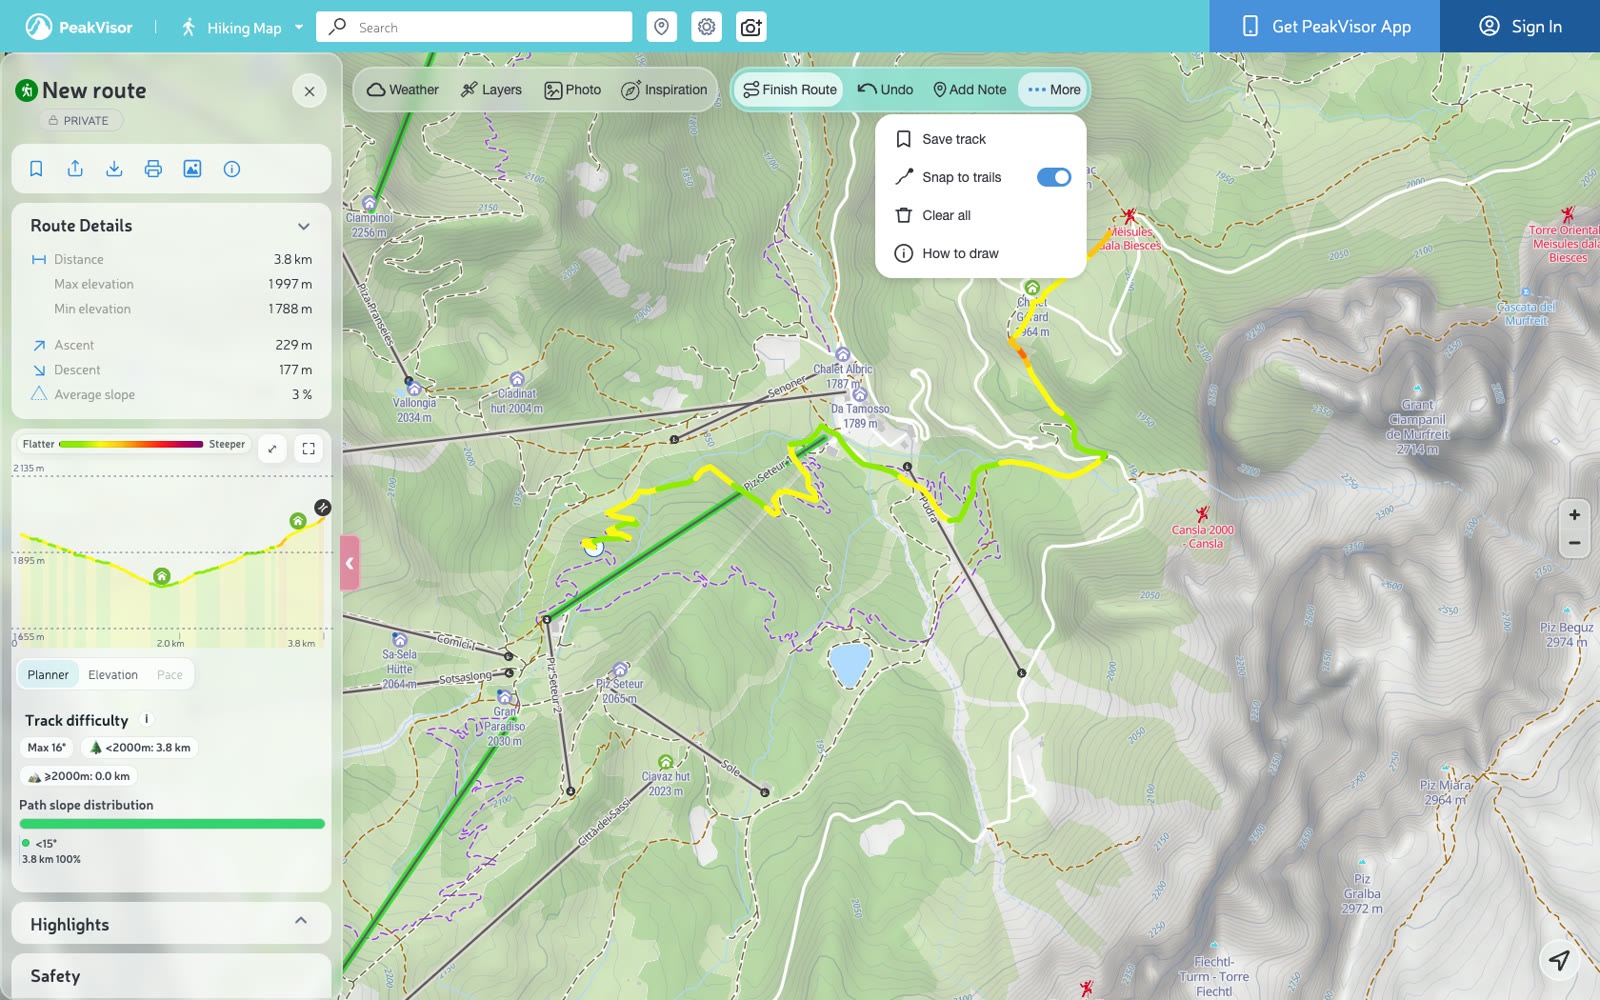
Snap to trails is on by default. For a ski tour, scramble or crossing of open terrain, you may want to place points freely. Turn snapping off under More → Snap to trails, and each point stays where you put it.
See where people actually walk
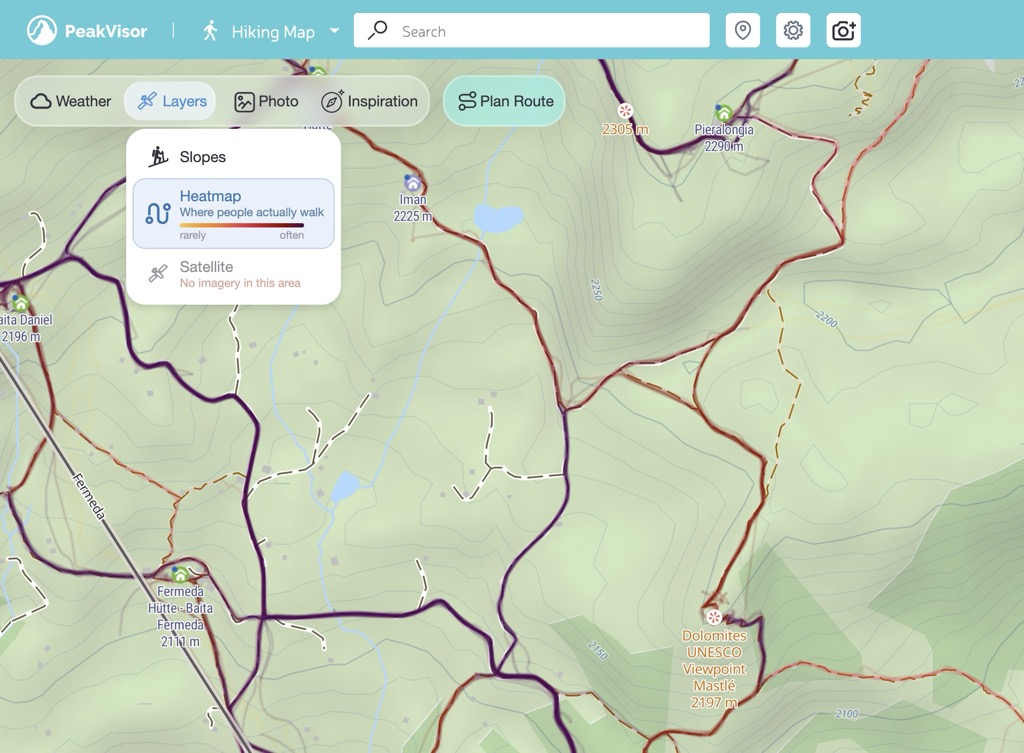
The heatmap adds recorded tracks to the map, showing where people have travelled. It's useful for comparing a planned route with the paths other people have taken.
Open Layers → Heatmap to see tracks coloured by how many users have recorded activity nearby. You may also see tracks outside the mapped trail network. A lightly used line can be worth a closer look, but the heatmap alone doesn't explain why fewer people went that way.
Other improvements
- Undo responds quickly, including when you're editing a long route.
- Route points are easier to select and drag when you want to make a small adjustment.
- The cursor tells you what will happen: crosshair while planning, an open hand over a point you can drag, a closed hand while you drag it.
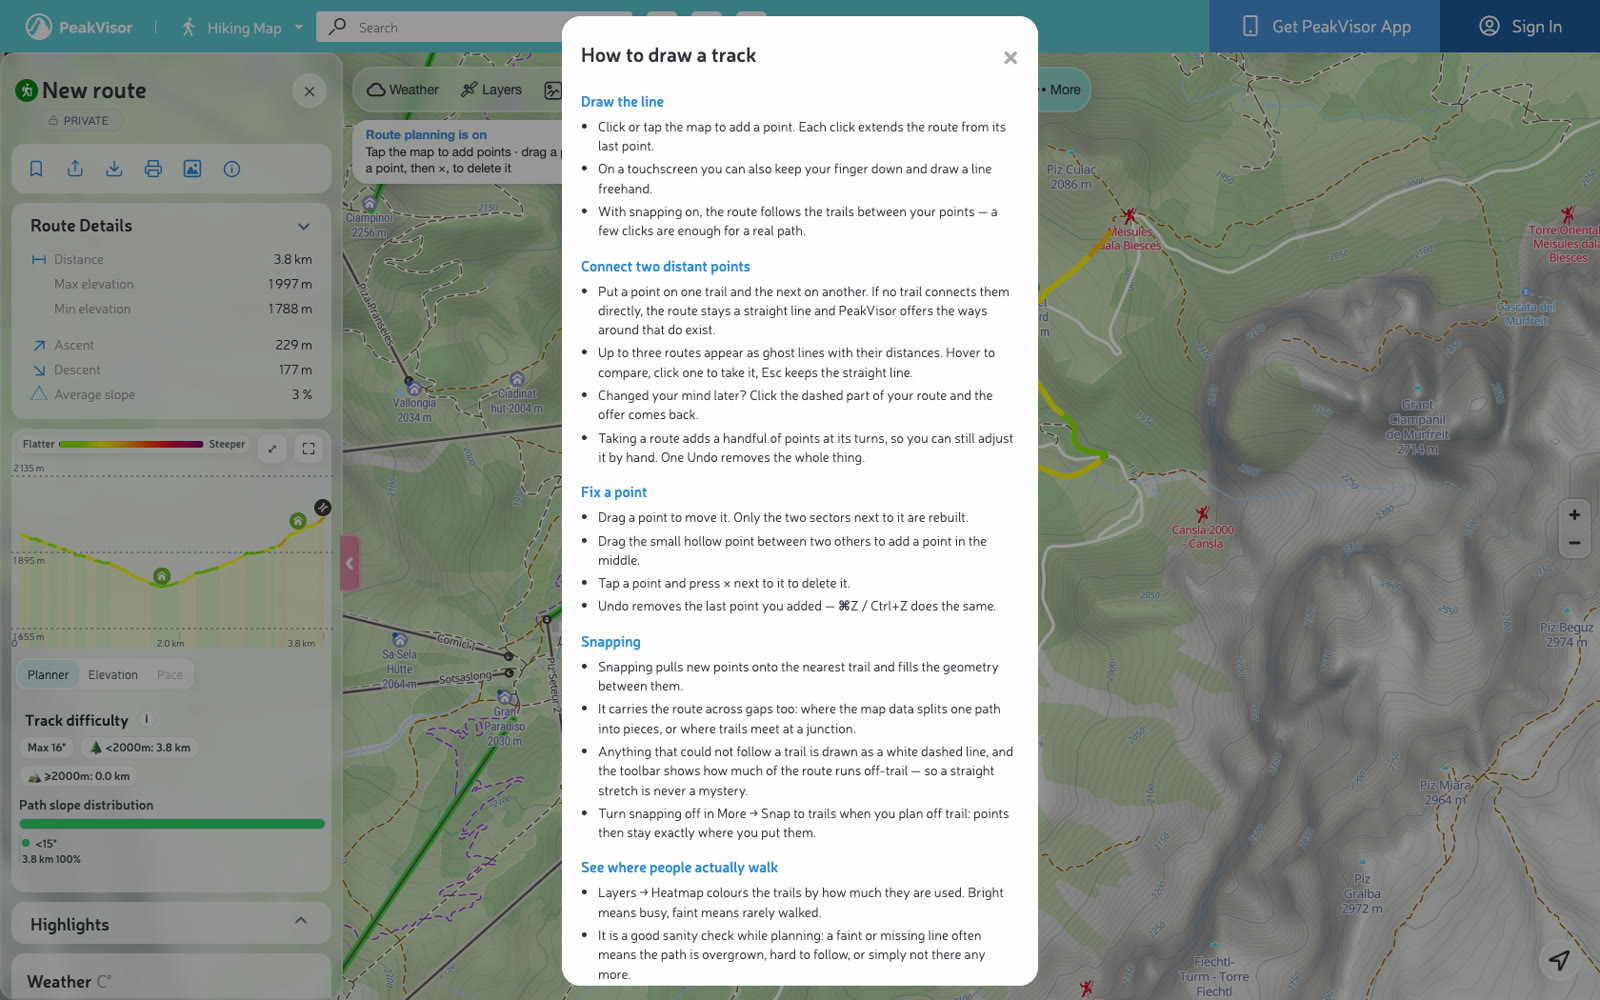
- How to draw in the planner menu now includes instructions for route suggestions and the heatmap.
Open the hiking map or ski touring map in your browser to try the planner. Draw a route, check its distance and ascent, and save it to your profile.